
You need to test on real devices. The options look like this:
Option A: Shared cloud — $250-400/device/month, data persists between sessions, devices shared with thousands of companies.
Option B: Enterprise private cloud — $10,000+/month minimum, 6-month contracts, sales calls.
Option C: Build your own — Your devices, your network, 10 minutes to set up.
This guide covers Option C.
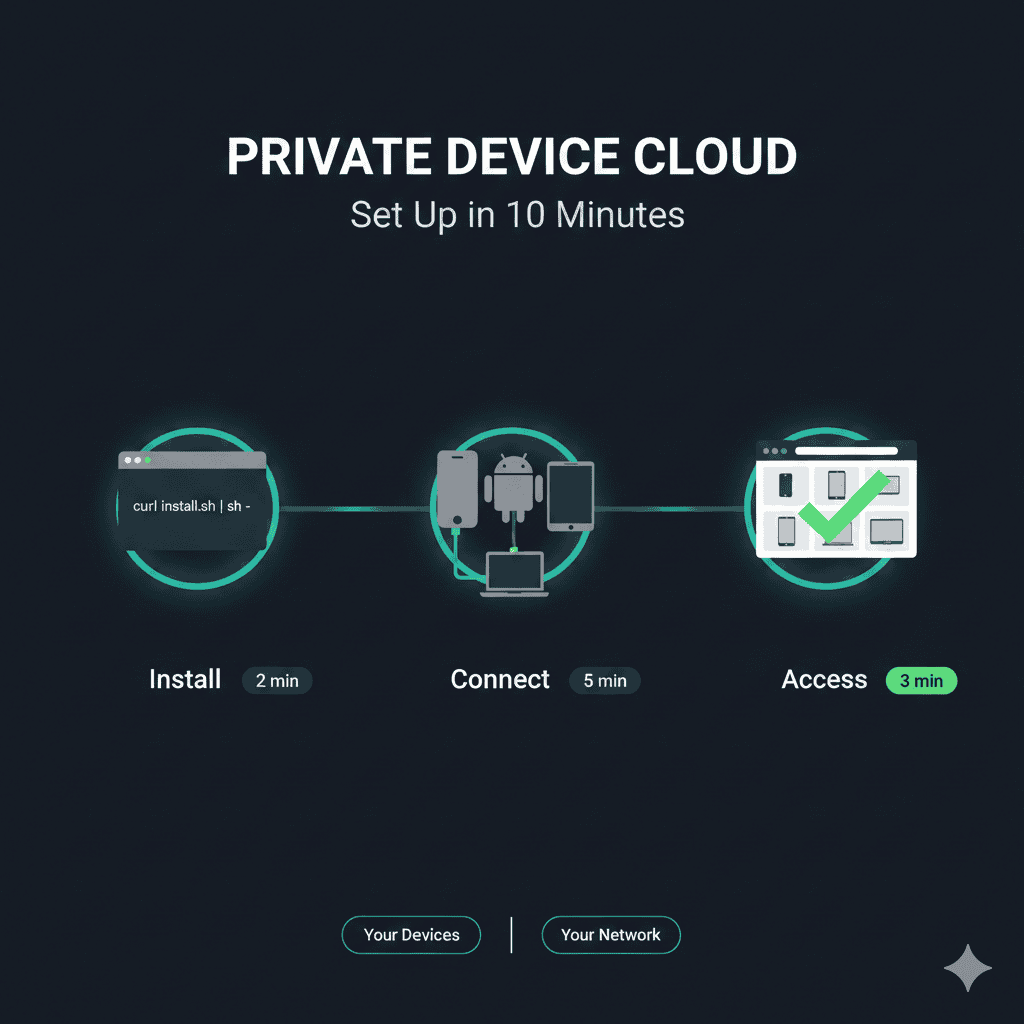
What You’ll Build
By the end of this tutorial, you’ll have:
- A private device cloud running on your network
- Remote access to your devices from any browser
- Integration with Appium, Maestro, or manual testing
- Zero data leaving your infrastructure
Time required: 10 minutes
Cost: $99/device/month (or free with open-source alternatives)
Prerequisites: At least one Android or iOS device, a computer with internet access
The Architecture: Why Peer-to-Peer Matters
Traditional device clouds route everything through vendor servers:
Your CI → Vendor servers → Vendor devices → Vendor servers → Results
Every test payload, every screenshot, every log file touches third-party infrastructure.
Peer-to-peer architecture eliminates the middleman:
Your CI → WebRTC → Your devices → Results
WebRTC establishes direct encrypted connections. Your test data flows between your browser and your devices without routing through anyone else’s servers.
This matters for:
- Security: No third-party data exposure
- Compliance: Data stays on your network (PCI DSS, HIPAA, SOC 2)
- Latency: Direct connections = faster response
- Cost: No per-minute usage fees
Option 1: DeviceLab (2 Steps)
The fastest path to a private device cloud.
Step 1: Add Device Nodes
First, prepare your devices:
For Android:
- Enable Developer Options (tap Build Number 7 times in Settings → About Phone)
- Enable USB Debugging in Developer Options
- Connect device via USB
- Accept the debugging prompt on the device
For iOS:
- Enable Developer Mode (Settings → Privacy & Security → Developer Mode)
- Connect device via USB
- Trust the computer when prompted
- Note: Requires macOS host machine
Then run one command to connect your devices to DeviceLab:
curl -fsSL https://app.devicelab.dev/device-node/KEY | sh
Replace KEY with your unique team key from app.devicelab.dev.
This automatically detects physical devices (Android & iOS), emulators, and simulators. Runs continuously until stopped (Ctrl+C).
Step 2: Run Tests
Download and run sample tests for your framework, or point your existing tests at DeviceLab.
For Maestro Tests
- Download
maestro-android-sample.zipfrom the DeviceLab dashboard - Extract and navigate:
unzip maestro-android-sample.zip && cd maestro-android-sample
- Run tests:
curl -fsSL https://app.devicelab.dev/test-node/KEY | sh -s -- \
  --framework maestro \
  --platform android \
  --app ./TestHiveApp.apk \
  --tests ./maestro-tests
For Appium Tests (Java)
- Download
appium-android-java-sample.zipfrom the DeviceLab dashboard - Extract and navigate:
unzip appium-android-java-sample.zip && cd appium-android-java-sample
- Terminal 1 - Start server:
curl -fsSL https://app.devicelab.dev/test-node/KEY | sh -s -- \
  --framework appium \
  --app ./TestHiveApp.apk
- Terminal 2 - Run tests:
mvn clean test
For Appium Tests (Python)
- Download
appium-android-python-sample.zipfrom the DeviceLab dashboard - Extract and navigate:
unzip appium-android-python-sample.zip && cd appium-android-python-sample
- Terminal 1 - Start server:
curl -fsSL https://app.devicelab.dev/test-node/KEY | sh -s -- \
  --framework appium \
  --app ./TestHiveApp.apk
- Terminal 2 - Run tests:
pytest
Access Your Devices
Open your browser and navigate to the DeviceLab dashboard:
https://app.devicelab.dev/devices
You can now:
- View real-time screen mirroring
- Control devices via touch/click
- Run ADB commands
- Execute Appium or Maestro tests
- Share device access with your team
Integrate with CI/CD
DeviceLab works with any CI/CD system. The pattern is simple:
- Device nodes run on a machine with physical devices (self-hosted runner or dedicated server)
- Test nodes run in your CI pipeline
GitHub Actions (Self-Hosted Runner)
First, set up a self-hosted runner on the machine with your devices:
# .github/workflows/mobile-tests.yml
name: Mobile Tests

on:
  push:
    branches: [main]
  pull_request:

jobs:
  test-android:
    runs-on: self-hosted  # Runner on machine with devices
    steps:
      - uses: actions/checkout@v4

      - name: Run Maestro tests
        run: |
          curl -fsSL https://app.devicelab.dev/test-node/${{ secrets.DEVICELAB_KEY }} | sh -s -- \
            --framework maestro \
            --platform android \
            --app ./app/build/outputs/apk/debug/app-debug.apk \
            --tests ./maestro-tests

  test-appium:
    runs-on: self-hosted
    steps:
      - uses: actions/checkout@v4

      - name: Start Appium server
        run: |
          curl -fsSL https://app.devicelab.dev/test-node/${{ secrets.DEVICELAB_KEY }} | sh -s -- \
            --framework appium \
            --app ./app-debug.apk &
          sleep 10  # Wait for server to start

      - name: Run tests
        run: npm test
GitLab CI (Shell Runner)
# .gitlab-ci.yml
stages:
  - test

android-tests:
  stage: test
  tags:
    - devicelab  # Tag for runner with devices
  script:
    - curl -fsSL https://app.devicelab.dev/test-node/${DEVICELAB_KEY} | sh -s --
        --framework maestro
        --platform android
        --app ./app-debug.apk
        --tests ./maestro-tests
  artifacts:
    when: always
    paths:
      - test-results/
Jenkins Pipeline
// Jenkinsfile
pipeline {
    agent { label 'devicelab' }  // Agent with devices attached

    stages {
        stage('Build') {
            steps {
                sh './gradlew assembleDebug'
            }
        }

        stage('Test') {
            steps {
                sh '''
                    curl -fsSL https://app.devicelab.dev/test-node/${DEVICELAB_KEY} | sh -s -- \
                        --framework maestro \
                        --platform android \
                        --app ./app/build/outputs/apk/debug/app-debug.apk \
                        --tests ./maestro-tests
                '''
            }
        }
    }
}
CircleCI (Resource Class)
# .circleci/config.yml
version: 2.1

jobs:
  test-mobile:
    machine: true
    resource_class: your-org/devicelab  # Self-hosted runner
    steps:
      - checkout
      - run:
          name: Run mobile tests
          command: |
            curl -fsSL https://app.devicelab.dev/test-node/${DEVICELAB_KEY} | sh -s -- \
              --framework maestro \
              --platform android \
              --app ./app-debug.apk \
              --tests ./maestro-tests

workflows:
  test:
    jobs:
      - test-mobile
For Appium Tests in CI
When running Appium tests, the test-node command starts a local Appium server:
# Terminal 1: Start Appium server via DeviceLab
curl -fsSL https://app.devicelab.dev/test-node/KEY | sh -s -- \
  --framework appium \
  --app ./app-debug.apk

# Terminal 2: Run your tests (connects to localhost:4723)
npm test
# or
pytest
# or
mvn test
Your test code connects to http://localhost:4723 — no need to set the app capability since DeviceLab handles app installation.
That’s it. Private device cloud, running on your infrastructure, integrated with your CI/CD pipeline.
Option 2: OpenSTF / DeviceFarmer (2-4 Hours)
OpenSTF (Smartphone Test Farm) is the open-source alternative. It’s free but requires significant setup.
Prerequisites
- Docker and Docker Compose
- Node.js 8.x (newer versions have compatibility issues)
- RethinkDB
- GraphicsMagick
- ZeroMQ
- Protocol Buffers
Step 1: Install Dependencies
On macOS:
brew install rethinkdb graphicsmagick zeromq protobuf yasm pkg-config
On Ubuntu:
sudo apt-get install rethinkdb graphicsmagick libzmq3-dev protobuf-compiler yasm
Step 2: Start RethinkDB
rethinkdb --bind all
RethinkDB must be running before STF can start.
Step 3: Install and Start STF
npm install -g @devicefarmer/stf
stf local --public-ip your.ip.address
Step 4: Connect Devices
Devices connected via USB should appear in the STF web interface at http://localhost:7100.
Limitations of OpenSTF
- Android only: iOS support requires additional work and isn’t production-ready
- No remote access: Devices must be USB-connected to the STF host
- Complex scaling: Distributed deployments require Kubernetes expertise
- Maintenance burden: Dependencies frequently break with OS updates
- No commercial support: Community-driven, slow development
OpenSTF works well for internal Android-only labs. For iOS support, remote access, or production deployments, you’ll need a commercial solution.
Option 3: Build From Scratch (Days to Weeks)
You can build your own device cloud infrastructure. Here’s what’s involved:
Components Needed
| Component | Purpose | Complexity |
|---|---|---|
| ADB server | Android device communication | Low |
| libimobiledevice | iOS device communication | Medium |
| Screen mirroring | Real-time display capture | High |
| Touch injection | Remote input handling | High |
| WebRTC signaling | Peer connection setup | High |
| TURN server | NAT traversal fallback | Medium |
| Device management | Inventory, health, allocation | Medium |
| Web UI | User interface | Medium |
| Authentication | User management, API keys | Medium |
| CI integration | Appium/Selenium endpoints | Medium |
The Hard Parts
Screen mirroring is the biggest challenge. You need:
- Low-latency video encoding (H.264)
- Efficient transport (WebRTC DataChannels or Media Streams)
- Cross-platform capture (different APIs for Android/iOS)
For Android, scrcpy provides excellent screen mirroring but wasn’t designed for multi-device cloud deployments.
For iOS, you need to work with Apple’s private frameworks or use licensed solutions.
Touch injection requires:
- Android: ADB input events or custom agents
- iOS: XCTest framework or WebDriverAgent
NAT traversal gets complicated when devices and users are on different networks. You’ll need:
- STUN servers for connection negotiation
- TURN servers for relay fallback
- Proper ICE candidate handling
Time Estimate
| Approach | Time to Production |
|---|---|
| DeviceLab | 10 minutes |
| OpenSTF (Android only) | 2-4 hours |
| Custom build | 2-6 months |
Unless you have specific requirements that no existing solution meets, building from scratch isn’t worth the engineering investment.
Device Selection: What to Include
Your device lab should represent your actual user base, not just flagship phones.
Recommended Starting Set
| Category | Examples | Why |
|---|---|---|
| Current flagship | iPhone 16, Pixel 9, Galaxy S24 | Latest OS features |
| Mid-range Android | Pixel 7a, Galaxy A54 | Largest market segment |
| Budget Android | Moto G, Redmi | Performance edge cases |
| Older iOS | iPhone 12, iPhone SE | iOS backward compatibility |
| Tablets | iPad, Galaxy Tab | Different form factors |
Device Selection Principles
- Match your analytics: If 30% of your users are on Samsung devices, your lab should reflect that
- Include low-end devices: Performance issues often only appear on constrained hardware
- Cover OS versions: Keep devices on different iOS/Android versions
- Consider screen sizes: Test responsive layouts on various dimensions
How Many Devices?
| Team Size | Recommended Devices |
|---|---|
| Solo developer | 3-5 |
| Small team (2-5) | 5-10 |
| Medium team (5-15) | 10-20 |
| Large team (15+) | 20+ |
Start small. You can always add devices as your testing needs grow.
Cost Comparison
Let’s compare the true cost of different approaches for a 10-device lab.
Shared Cloud (BrowserStack, Sauce Labs)
| Item | Monthly Cost |
|---|---|
| Device access | $2,500-4,000 |
| Parallel execution | Often extra |
| Priority support | Often extra |
| Total | $3,000-5,000/month |
Plus: Compliance risk, data on third-party servers, device availability issues.
Enterprise Private Cloud
| Item | Monthly Cost |
|---|---|
| Dedicated devices | $10,000+ minimum |
| Setup fees | Often $5,000-20,000 |
| Annual commitment | Required |
| Total | $10,000+/month |
Plus: Long contracts, vendor lock-in.
Your Own Devices + DeviceLab
| Item | Monthly Cost |
|---|---|
| DeviceLab subscription | $990 (10 × $99) |
| Device cost | $0 (use existing) or ~$200-500 one-time per device |
| Total | $990/month |
Plus: Complete data control, no contracts, scale up or down anytime.
Your Own Devices + OpenSTF
| Item | Monthly Cost |
|---|---|
| Software | $0 |
| Server hosting | $50-200 |
| Engineering time | Significant |
| Total | $50-200/month + engineering overhead |
Plus: Android only, no support, maintenance burden.
Troubleshooting Common Issues
Android Device Not Detected
# Check ADB sees the device
adb devices

# If unauthorized, check the device screen for a prompt
# If offline, try:
adb kill-server
adb start-server
iOS Device Not Detected
# Check libimobiledevice sees the device
idevice_id -l

# If not listed, try:
# 1. Unplug and replug the device
# 2. Trust the computer again on the device
# 3. Restart the device
Screen Mirroring Lag
Lag usually indicates network issues:
- Same network: Ensure device and host are on the same WiFi/LAN
- 5GHz WiFi: Use 5GHz band if available (less interference)
- Wired connection: USB connections have lower latency than WiFi
WebRTC Connection Failed
If peer connections fail:
- Firewall: Ensure UDP ports aren’t blocked
- VPN: Some VPNs interfere with WebRTC; try disabling
- TURN fallback: Check TURN server connectivity for NAT traversal
Security Considerations
A private device cloud is only as secure as your implementation.
Network Security
- Keep devices on a dedicated VLAN
- Use firewall rules to restrict device network access
- Monitor outbound connections from test devices
Access Control
- Implement proper authentication (SSO, 2FA)
- Use role-based access control for team sharing
- Audit device access logs
Data Handling
- Wipe devices between test sessions (or don’t share devices between security contexts)
- Don’t store sensitive credentials in test scripts
- Use synthetic test data, not production data
Compliance
Private device clouds help with compliance, but you’re still responsible for:
- Documenting your security controls
- Implementing appropriate access logging
- Following your organization’s data handling policies
See our PCI DSS mobile testing guide for compliance-specific considerations.
Frequently Asked Questions
How long does it take to set up a private device cloud?
With DeviceLab, you can set up a private device cloud in under 10 minutes. Run one curl command, plug in your devices, and access them from anywhere. Traditional solutions like OpenSTF require hours of configuration with RethinkDB, Node.js dependencies, and Docker containers.
What’s the difference between a private device cloud and shared cloud testing?
A private device cloud uses your own physical devices on your network. Test data never leaves your infrastructure. Shared cloud services like BrowserStack use devices shared with thousands of other companies—AWS Device Farm admits data “can persist between sessions” and physical device data “is not encrypted at rest.”
Can I use my existing devices for a private device cloud?
Yes. Any Android device with USB debugging enabled or iOS device with developer mode can be added to a private device cloud. You can use phones and tablets you already own, including older devices that still represent your user base.
Do I need a Mac to test iOS devices in a private device cloud?
Yes, iOS devices require a macOS host machine due to Apple’s development toolchain requirements (Xcode, libimobiledevice). Android devices can connect to any operating system—Windows, Linux, or macOS.
How does WebRTC peer-to-peer work for device testing?
WebRTC establishes direct encrypted connections between your browser and devices. Screen mirroring, touch input, and ADB commands flow directly between endpoints without routing through intermediate servers. This eliminates data exposure to third parties and reduces latency.
Can I run parallel tests on a private device cloud?
Yes. Each device can run tests independently. With 10 devices, you can run 10 parallel test sessions. This is the same parallelization model as cloud providers, but on your own infrastructure.
What happens if my host machine goes offline?
Devices connected to that host become unavailable until it’s back online. For high availability, you can run multiple host machines and distribute devices across them.
Next Steps
Ready to try it?
- Sign up for DeviceLab — Free trial, no credit card required
- Add device nodes:
curl -fsSL https://app.devicelab.dev/device-node/KEY | sh - Run your first test
Want to learn more?
- Cloud Device Lab Security Risks — Why shared infrastructure creates compliance problems
- PCI DSS Mobile Testing Guide — Compliance requirements for fintech apps
- Mobile Device Cloud Pricing Comparison — How DeviceLab compares to BrowserStack, Sauce Labs, and others