
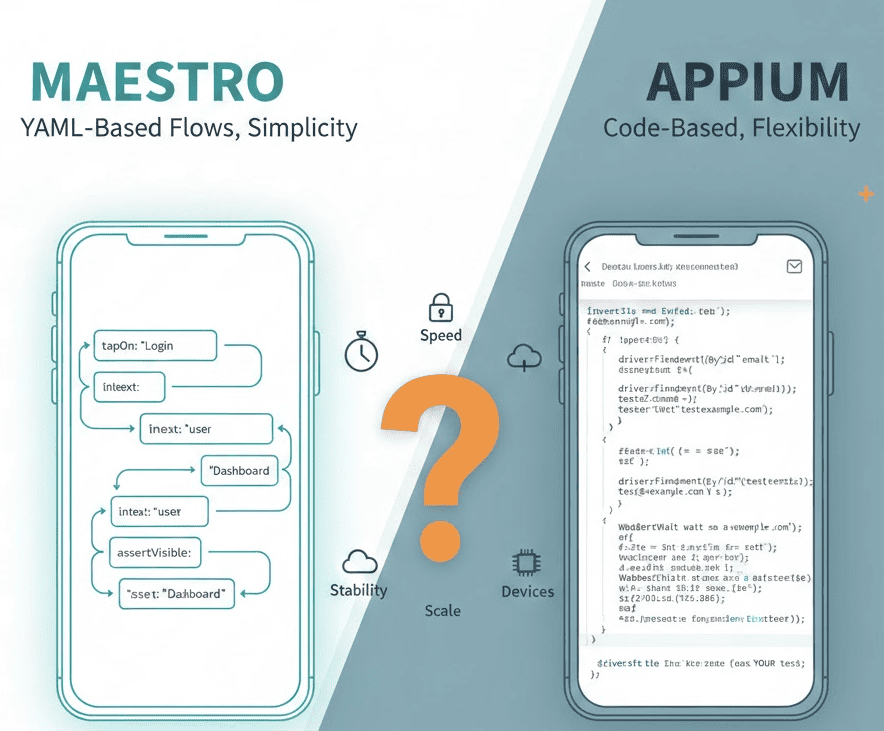
Every “Maestro vs Appium” article compares YAML to code. None of them answer the question that actually matters: where do you run the tests, and what does it cost?
I’ve spent 12+ years building mobile test infrastructure. If you’re searching for an Appium alternative, this comparison covers what actually matters. I’ve written Appium tests for enterprise clients running 10,000+ tests daily. I’ve also contributed to Maestro’s open-source codebase (PR #2856). This comparison comes from actual production experience with both frameworks.
Here’s the honest take.
The 60-Second Decision
| Factor | Choose Maestro | Choose Appium |
|---|---|---|
| Team skill level | Non-technical QA, product managers can write tests | Developers, SDETs with coding experience |
| Test complexity | Standard UI flows (login, checkout, navigation) | Complex logic, data-driven tests, API integrations |
| Setup time | Minutes (single binary) | Hours (server, drivers, SDKs, language setup) |
| iOS physical devices | ❌ Not supported (simulators only) | ✅ Fully supported |
| Flakiness handling | Built-in, automatic | Manual implementation required |
| Parallel execution | --shard-split N flag |
Requires grid setup or cloud service |
| Cost at scale | $250/device/month (Maestro Cloud) or self-host | Free (open-source) + infrastructure costs |
TL;DR: Maestro for speed and simplicity. Appium for flexibility and iOS physical devices.
But that’s not the whole story.
What Is Maestro?
Maestro is a mobile UI testing framework released in 2022 by Mobile.dev. Tests are written in YAML. No programming required.
Current version: 2.0.10 (November 2025) — GitHub Releases
# login-flow.yaml
appId: com.example.app
---
- launchApp
- tapOn: "Sign In"
- tapOn: "Email"
- inputText: "[email protected]"
- tapOn: "Password"
- inputText: "password123"
- tapOn: "Submit"
- assertVisible: "Welcome"
That’s a complete test. No imports, no driver setup, no explicit waits.
Key features:
- YAML-based test flows
- Built-in flakiness handling (automatic retries, smart waits)
- Hot-reloading (tests rerun on file save)
- Maestro Studio (visual element inspector)
- Parallel execution with
--shard-split - Supports iOS simulators, Android emulators, and Android physical devices
What Is Appium?
Appium is a mobile automation framework released in 2012. It extends Selenium’s WebDriver protocol to mobile platforms. Tests are written in code.
Current version: 2.19.0+ with decoupled drivers — Appium Migration Guide
// LoginTest.java
public class LoginTest {
    private AndroidDriver driver;

    @BeforeTest
    public void setup() throws MalformedURLException {
        DesiredCapabilities caps = new DesiredCapabilities();
        caps.setCapability("platformName", "Android");
        caps.setCapability("appium:automationName", "UiAutomator2");
        caps.setCapability("appium:deviceName", "Pixel_7");
        caps.setCapability("appium:app", "/path/to/app.apk");

        driver = new AndroidDriver(
            new URL("http://localhost:4723"), caps
        );
    }

    @Test
    public void testLogin() {
        WebDriverWait wait = new WebDriverWait(driver, Duration.ofSeconds(10));

        wait.until(ExpectedConditions.visibilityOfElementLocated(
            AppiumBy.accessibilityId("Sign In")
        )).click();

        driver.findElement(AppiumBy.accessibilityId("Email"))
            .sendKeys("[email protected]");

        driver.findElement(AppiumBy.accessibilityId("Password"))
            .sendKeys("password123");

        driver.findElement(AppiumBy.accessibilityId("Submit")).click();

        wait.until(ExpectedConditions.visibilityOfElementLocated(
            AppiumBy.accessibilityId("Welcome")
        ));
    }

    @AfterTest
    public void teardown() {
        if (driver != null) driver.quit();
    }
}
Same test. More code. More control.
Key features:
- Code-based tests (Java, Python, JavaScript, C#, Ruby)
- Full programming language capabilities
- Supports iOS (simulators + physical), Android (emulators + physical)
- Modular driver architecture (Appium 2.0+)
- Plugin ecosystem
- Integrates with any test framework (JUnit, TestNG, pytest, etc.)
Setup Comparison
Maestro Setup
# Install
curl -Ls "https://get.maestro.mobile.dev" | bash

# Run a test
maestro test login-flow.yaml
Time to first test: 5 minutes.
Appium Setup
# Install Node.js (if not present)
# Install Appium
npm install -g appium

# Install drivers
appium driver install uiautomator2
appium driver install xcuitest

# Install Android SDK (if not present)
# Install Xcode (if not present)
# Configure ANDROID_HOME, JAVA_HOME
# Set up an emulator or connect a device

# Start Appium server
appium

# In another terminal, run your test
./gradlew test
Time to first test: 1-4 hours (depending on existing SDK setup).
Winner: Maestro. Not even close for setup speed.
Test Authoring
Maestro: YAML Flows
# checkout-flow.yaml
appId: com.example.shop
---
- launchApp
- tapOn: "Products"
- tapOn:
    id: "product-card-1"
- tapOn: "Add to Cart"
- tapOn: "Cart"
- assertVisible: "1 item"
- tapOn: "Checkout"
- inputText:
    id: "card-number"
    text: "4242424242424242"
- tapOn: "Pay Now"
- assertVisible: "Order Confirmed"
Pros:
- Readable by anyone
- No programming knowledge required
- Maestro Studio generates YAML from interactions
- Hot-reloading for rapid iteration
Cons:
- Limited to built-in commands
- Complex logic requires JavaScript workarounds
- No loops, conditionals, or functions in YAML
- Data-driven testing is awkward
Appium: Code-Based Tests
# test_checkout.py
import pytest
from appium import webdriver
from appium.options.android import UiAutomator2Options

class TestCheckout:
    @pytest.fixture(autouse=True)
    def setup(self):
        options = UiAutomator2Options()
        options.app = "/path/to/app.apk"
        self.driver = webdriver.Remote("http://localhost:4723", options=options)
        yield
        self.driver.quit()

    def test_checkout_flow(self):
        self.driver.find_element("accessibility id", "Products").click()

        # Dynamic product selection
        products = self.driver.find_elements("class name", "product-card")
        products[0].click()

        self.driver.find_element("accessibility id", "Add to Cart").click()
        self.driver.find_element("accessibility id", "Cart").click()

        # Data-driven card entry
        test_cards = ["4242424242424242", "5555555555554444"]
        for card in test_cards:
            self.enter_payment(card)
            self.verify_order()
            self.reset_cart()

    def enter_payment(self, card_number):
        self.driver.find_element("id", "card-number").send_keys(card_number)
        self.driver.find_element("accessibility id", "Pay Now").click()

    def verify_order(self):
        assert self.driver.find_element("accessibility id", "Order Confirmed")
Pros:
- Full programming language power
- Loops, conditionals, functions, classes
- Data-driven testing built-in
- Page Object Model support
- Integrates with any testing framework
Cons:
- Requires programming skills
- More verbose
- Manual wait strategies needed
- Higher maintenance overhead
Winner: Depends on your needs. Maestro for simplicity, Appium for flexibility.
Flakiness Handling
This is where Maestro shines.
Maestro: Built-in Tolerance
Maestro automatically (with hardcoded values):
- Retries failed interactions
- Waits for elements to appear
- Handles animation delays
- Tolerates slow network responses
You write:
- tapOn: "Submit"
Maestro internally tries multiple times with smart waits. If the button isn’t immediately visible, it waits and retries.
Appium: Manual Implementation
You must handle flakiness yourself:
// Explicit wait (minimum)
WebDriverWait wait = new WebDriverWait(driver, Duration.ofSeconds(10));
wait.until(ExpectedConditions.elementToBeClickable(
    AppiumBy.accessibilityId("Submit")
)).click();

// With retry logic (better)
public void tapWithRetry(By locator, int maxRetries) {
    for (int i = 0; i < maxRetries; i++) {
        try {
            WebDriverWait wait = new WebDriverWait(driver, Duration.ofSeconds(5));
            wait.until(ExpectedConditions.elementToBeClickable(locator)).click();
            return;
        } catch (Exception e) {
            if (i == maxRetries - 1) throw e;
            Thread.sleep(1000);
        }
    }
}
Every team building Appium tests eventually writes a wrapper library for reliability. Maestro has this built-in—though there are scenarios where it fails.
Winner: Maestro. Significantly less flaky out of the box.
Debugging Failed Tests
When a test fails, the framework’s tooling determines how quickly you find the cause.
Maestro Studio
Maestro Studio is a visual element inspector bundled with the Maestro binary. It mirrors your device screen in a browser, lets you click elements to generate matching YAML selectors, and records the flow as you interact. No separate install, no server to start.
When a test fails, Maestro automatically captures the failing command, the on-screen state, and a screenshot — every run, without configuration.
Appium Inspector
Appium Inspector is a separate Electron application. It requires the Appium server running and an active device session. You connect Inspector to the session, then click through elements to find selectors.
Failure output is minimal by default. You add screenshot capture explicitly:
File screenshot = ((TakesScreenshot) driver).getScreenshotAs(OutputType.FILE);
FileUtils.copyFile(screenshot, new File("failure-" + testName + ".png"));
Most teams end up writing a TestNG/JUnit listener that does this for every test.
Hot-reload vs restart
Maestro reruns the flow when the YAML file is saved — 2-5 seconds from edit to result. Appium requires recompilation (Java/Kotlin) or interpreter restart (Python) and a fresh device session — 15-60 seconds per iteration.
Winner: Maestro. Studio plus hot-reload makes the debug loop roughly 10x tighter than Appium’s edit/build/restart cycle.
The iOS Physical Device Problem
This is Maestro’s biggest limitation, and most comparison articles bury it or skip it entirely.
Open-source Maestro does not support iOS physical devices.
From TestDevLab’s Maestro guide:
“Real iOS devices are not supported. That limits testing possibilities on Windows and Linux OS and might slow down the process on macOS.”
From StickyMinds:
“Maestro doesn’t support iOS real devices.”
The official Maestro documentation only mentions “iOS simulators” — physical iOS devices are conspicuously absent. Learn more about Maestro on real iOS devices.
Why does this matter?
-
iOS simulators ≠ real iPhones
- Simulators don’t have cameras, GPS, Bluetooth, or cellular
- Push notifications behave differently
- Performance characteristics differ
- Some bugs only appear on real hardware
-
App Store testing requires real devices
- Apple’s TestFlight runs on real devices
- Production bugs often don’t reproduce on simulators
-
Enterprise compliance often mandates real device testing
Appium: Full iOS Support
Appium supports both iOS simulators and physical devices via the XCUITest driver:
DesiredCapabilities caps = new DesiredCapabilities();
caps.setCapability("platformName", "iOS");
caps.setCapability("appium:automationName", "XCUITest");
caps.setCapability("appium:deviceName", "iPhone 15 Pro");
caps.setCapability("appium:udid", "00008110-001A2D3E4F5G6H7I"); // Physical device
caps.setCapability("appium:app", "/path/to/app.ipa");
Winner: Appium. If you need iOS physical devices, Maestro isn’t an option (unless you use Maestro Cloud or a solution like DeviceLab).
Performance
Test Execution Speed
Maestro executes commands directly through platform-specific automation (UIAutomator2, XCUITest). There’s no WebDriver protocol overhead.
Appium adds a layer: your test → Appium server → WebDriver protocol → platform driver → device.
In practice:
- Maestro tests typically run 20-30% faster than equivalent Appium tests
- Hot-reloading makes Maestro iteration 10x faster during development
Startup Time
Maestro: Immediate. No server to start.
Appium: 3-10 seconds to start a session (driver initialization, app installation).
Winner: Maestro for raw speed.
Parallel Execution
Maestro
# Run tests across 3 devices
maestro test flows/ --shard-split 3
Simple. Works with connected devices or emulators.
Appium
Parallel execution requires:
- Multiple Appium server instances (different ports)
- A test runner that supports parallel execution (TestNG, pytest-xdist)
- Thread-safe test code
- Or: a Selenium Grid / cloud service
// TestNG parallel configuration
@Test(threadPoolSize = 3, invocationCount = 1)
public void testLogin() {
    // Test code
}
More setup, but more control over distribution.
Winner: Maestro for simplicity. Appium for fine-grained control.
CI/CD Integration
Both frameworks ship with first-class CI support. The day-one setup cost is very different.
Maestro CLI in CI
The vanilla Maestro CI pattern is a single script step that downloads the binary and runs your flows:
# GitHub Actions — vanilla Maestro CLI
- name: Run Maestro Tests
  run: |
    curl -Ls "https://get.maestro.mobile.dev" | bash
    export PATH=$PATH:~/.maestro/bin
    maestro test flows/ --shard-split 3
No server to manage, no drivers to install, parallel sharding built into the CLI. The same pattern works on any CI runner that can execute a shell command and connect to a device or emulator.
The constraint: vanilla Maestro CI needs a device or emulator in the CI environment. On hosted Linux runners you boot an Android emulator (slow, often flaky). For real iOS devices, you need either a self-hosted runner with devices attached, or a cloud device provider.
Real-device CI: maestro-runner via DeviceLab
For real-device CI without managing the runner yourself, DeviceLab’s open-source maestro-runner is a drop-in replacement for the Maestro CLI that executes flows on DeviceLab-managed devices. A minimal Bitrise script step looks like this:
# bitrise.yml — maestro-runner via DeviceLab on Bitrise
workflows:
  primary:
    steps:
    - script@1:
        title: Run Maestro tests on DeviceLab
        inputs:
        - content: |-
            #!/usr/bin/env bash
            set -eo pipefail
            curl -fsSL "$DEVICELAB_TEST_NODE_URL" | sh -s -- \
              --framework maestro \
              --platform android \
              --app "$BITRISE_SOURCE_DIR/app/build/outputs/apk/release/app-release.apk" \
              --tests "$BITRISE_SOURCE_DIR/maestro/flows"
One script step runs Maestro YAML flows on a real Android device — no Android SDK in CI, no emulator startup, no driver configuration. The maestro-runner binary reads the same YAML the official Maestro CLI does, so existing flows transfer unchanged.
Appium in CI
# GitHub Actions
- name: Set up Appium
  run: |
    npm install -g appium@2
    appium driver install uiautomator2
    appium driver install xcuitest
    appium &
    sleep 5
- name: Run tests
  run: ./gradlew test
You’re managing a server process, driver installation, language runtime setup, and a separate test runner. Parallelization typically requires multiple Appium server instances on different ports or a Selenium Grid setup.
Common pitfalls
| Issue | Maestro | Appium |
|---|---|---|
| Test passes locally, fails in CI | Rare — same binary, same logic | Common — driver and server-timing variance |
| Parallel test setup | --shard-split N flag |
Multiple server ports + thread-safe code |
For Jenkins, GitHub Actions, and GitLab CI examples on real devices, see our Maestro CI/CD setup guide.
Winner: Maestro for first-time CI setup. Appium when you already have a mature Jenkins/TestNG pipeline you don’t want to rewrite.
The Hidden Question: Where Do You Run Them?
Every comparison article stops at syntax. But the real question is: where do you actually run these tests?
Option 1: Local Machine
Both frameworks work locally. Free, but limited:
- Only one device at a time (usually)
- Blocks your machine during test runs
- Doesn’t scale
Option 2: CI/CD with Emulators/Simulators
GitHub Actions (example):
# Maestro on GitHub Actions
- name: Run Maestro Tests
  run: |
    curl -Ls "https://get.maestro.mobile.dev" | bash
    $ANDROID_HOME/emulator/emulator -avd test_avd -no-window &
    adb wait-for-device
    maestro test flows/
Cost: Free (GitHub-hosted runners) or $0.008/minute (macOS runners).
Limitation: Emulators in CI are slow and flaky. iOS simulators require macOS runners (expensive).
Option 3: Cloud Device Services
| Service | Maestro Support | Appium Support | Cost |
|---|---|---|---|
| Maestro Cloud | ✅ Native | ❌ No | $250/device/month |
| BrowserStack | ⚠️ Outdated (v1.39) | ✅ Full | $199+/month |
| Sauce Labs | ❌ No | ✅ Full | Custom pricing |
| LambdaTest | ❌ No | ✅ Full | $119+/month |
The BrowserStack Maestro problem:
BrowserStack runs Maestro 1.39. The current version is 2.0.10. That’s a major version behind — missing parallel execution, AI commands, and dozens of bug fixes. If you’re considering migrating from BrowserStack, keep this in mind.
Option 4: Your Own Devices
Run tests on devices you own. This is where DeviceLab comes in.
| Framework | DeviceLab Support | iOS Physical | Cost |
|---|---|---|---|
| Maestro | ✅ Latest version | ✅ Yes | $99/device/month (1st free) |
| Appium | ✅ Any version | ✅ Yes | $99/device/month (1st free) |
The difference: DeviceLab runs the latest open-source Maestro (or any Appium version you want) on your own devices. Including iOS physical devices — something open-source Maestro alone can’t do.
Cost Comparison
Let’s do real math. Team of 5, running 500 tests/day, needing 3 parallel devices (2 Android, 1 iOS).
Maestro Cloud
Per official pricing:
- 3 devices × $250/month = $750/month
- Annual: $9,000
BrowserStack (Appium or Maestro 1.39)
- App Automate plan: $249-399/month (limited parallelism)
- For 3+ parallels: $500+/month
- Annual: $6,000-12,000
Self-Hosted (Appium)
- 3 devices (used): ~$1,000 one-time
- Mac Mini for iOS: ~$600 one-time
- Maintenance: 4-8 hours/month (your time)
- Annual hardware: ~$1,600 first year, ~$200/year after
DeviceLab (Maestro or Appium)
- 3 devices, 1st free = 2 × $99/month = $198/month
- You buy devices: ~$1,000 one-time
- Annual: $2,376 + $1,000 first year = $3,376
Over 3 years:
| Option | Year 1 | Year 2 | Year 3 | Total |
|---|---|---|---|---|
| Maestro Cloud | $9,000 | $9,000 | $9,000 | $27,000 |
| BrowserStack | $8,000 | $8,000 | $8,000 | $24,000 |
| Self-Hosted | $1,600 | $200 | $200 | $2,000 + time |
| DeviceLab | $3,376 | $2,376 | $2,376 | $8,128 |
Self-hosted is cheapest if you have DevOps time. DeviceLab is the middle path: you own devices, but don’t manage infrastructure.
When to Choose Maestro
✅ Choose Maestro when:
- Your QA team isn’t deeply technical
- You need fast test iteration
- Your tests are standard UI flows
- You primarily test on Android + iOS simulators
- You want minimal maintenance overhead
- You’re okay with paying $250/device/month for Maestro Cloud, or running locally
❌ Don’t choose Maestro when:
- You need iOS physical device testing (unless you use Maestro Cloud or DeviceLab)
- Your tests require complex logic, loops, or data-driven scenarios
- You need deep integration with your existing code/test frameworks
- You’re on BrowserStack (they run an outdated fork)
When to Choose Appium
✅ Choose Appium when:
- Your team has coding expertise (SDET, developers)
- You need full programming language capabilities
- You need iOS physical device testing
- You have existing Appium infrastructure
- You want maximum flexibility
- You need to integrate with existing test frameworks (JUnit, TestNG, pytest)
❌ Don’t choose Appium when:
- Your team can’t write code
- You want quick setup and fast iteration
- Test maintenance overhead is a concern
- You don’t have time to build flakiness handling
The Third Option: Use Both
Many teams use both frameworks:
-
Maestro for smoke tests and quick UI validation
- Run on every PR
- Fast feedback
- Non-technical team members can contribute
-
Appium for complex end-to-end scenarios
- Integration tests
- Data-driven tests
- iOS physical device testing
Both can run on the same devices in the same CI pipeline.
My Recommendation
Starting a new project? Start with Maestro. Write your first tests in YAML, get fast feedback, and see how far it takes you. You can always add Appium later for edge cases.
Have an existing Appium suite? Keep it. But consider adding Maestro for new smoke tests. The two frameworks complement each other.
Need iOS physical devices? You have three options:
- Appium (local or cloud)
- Maestro Cloud ($250/device/month)
- DeviceLab (run latest Maestro on your own iPhones)
On a budget? Self-host Appium on your own devices, or use DeviceLab to avoid infrastructure management.
Frequently Asked Questions
Is Maestro better than Appium?
Neither is universally better. Maestro wins on authoring speed, built-in flakiness handling, and CI setup. Appium wins on flexibility, iOS physical device support, and integration with existing test frameworks (JUnit, TestNG, pytest). Most teams that try Maestro for the first time say “yes, better” — until they hit a complex logic case Maestro can’t express in YAML.
Does Maestro support iOS physical devices?
Open-source Maestro supports iOS simulators only. For real iPhones you need either Maestro Cloud ($250/device/month), the community maestro-ios-device tool, or DeviceLab running community PR #2856. See our Maestro real-iOS guide for the full setup.
Is Maestro free?
The Maestro CLI is open-source under MIT license. Maestro Cloud (their hosted execution service) is $250/device/month. Running locally on emulators, simulators, or your own devices: free.
Should I switch from Appium to Maestro?
Consider switching if your tests are primarily standard UI flows, your QA team isn’t deeply technical, and you don’t need iOS physical devices. Keep Appium if you need data-driven tests, complex logic, multi-language support, or you have a mature existing Appium infrastructure that already works in CI.
Can I use both Maestro and Appium?
Yes — and many teams do. Common split: Maestro for smoke tests on every PR (fast feedback), Appium for complex end-to-end and iOS physical device tests. Both can run on the same CI infrastructure and the same devices.
What is Maestro Cloud pricing?
Maestro Cloud costs $250/device/month for iOS and Android, billed on maximum concurrent device executions. A team needing 3 parallel iOS plus 3 parallel Android pays $1,500/month, or $18,000/year. See the official pricing page for current tiers.
Which has fewer flaky tests, Maestro or Appium?
Maestro, out of the box. Maestro applies automatic retries and smart waits at the command level. Appium requires you to implement explicit waits and often a wrapper library for reliability. That said, Maestro’s flakiness handling has limits — at high test complexity, both frameworks need manual reliability engineering. Tip: catch obvious flow errors before they even reach the device using the free Maestro YAML Validator.
Which is faster: Maestro or Appium?
Maestro. Tests run 20-30% faster because Maestro hits platform automation APIs (UIAutomator2, XCUITest) directly, without a WebDriver protocol layer. Development iteration is 10x faster thanks to hot-reloading: edit the YAML, save, the test reruns in 2-5 seconds. Appium requires a full recompile/restart cycle on each change.
How do Maestro and Appium compare in CI/CD pipelines?
Both integrate cleanly with GitHub Actions, Jenkins, GitLab CI, CircleCI, and Bitrise. Maestro is dramatically simpler: a single binary, parallel sharding via --shard-split, no server to manage. Appium needs the server running, drivers installed, and explicit parallelization. For greenfield CI setup, Maestro wins. For existing Appium pipelines, migration rarely justifies the simplicity gain.
The Bottom Line
Maestro and Appium aren’t competitors. They’re different tools for different needs.
Maestro = simplicity. YAML flows, built-in flakiness handling, fast iteration. Limited flexibility, no iOS physical devices (in open-source).
Appium = flexibility. Full programming power, any device, any platform. More setup, more maintenance, steeper learning curve. Maestro could close some of that gap by adopting lessons from Appium’s architecture.
The framework you choose matters less than where you run it. Local emulators don’t scale. Cloud services are expensive. Your own devices with managed infrastructure (like DeviceLab) offer a middle path.
Choose based on your team’s skills, your test complexity, your device requirements, and your budget. Not just syntax.
Building mobile test infrastructure? DeviceLab runs both Maestro and Appium on your own devices — including iOS physical devices. No uploads, no third-party data access, latest framework versions. Start free.
Sources
Maestro:
- Maestro GitHub Releases — Current version 2.0.10
- Maestro Cloud Pricing — $250/device/month for iOS and Android
- Maestro Documentation — Official docs
- G2 Maestro Reviews — Confirms $250/device/month pricing
Maestro iOS Limitation:
- TestDevLab Guide — “Real iOS devices are not supported”
- StickyMinds Article — “Maestro doesn’t support iOS real devices”
- BrowserStack Guide — “Maestro does not natively support direct execution on physical iOS devices”
Appium:
- Appium Migration Guide 1.x to 2.x — Official migration documentation
- Sauce Labs Appium Versions — Version support matrix
- Perfecto Appium 2 Upgrade — Appium 2.19.0 details
DeviceLab Maestro iOS Support:
- PR #2856 — Community contribution for iOS device support
- maestro-ios-device — Standalone tool for real iOS devices